Wet floors and bare feet don't mix well. The right flooring can give you confidence and stability in your bathroom without making it look like a medical facility. Most non-slip solutions are affordable and can be installed over a weekend. This guide covers temporary fixes through permanent flooring changes, organized from lowest cost to highest investment.
About costs and installation: Prices listed are for materials only. Some options require basic tools like a drill, utility knife, and measuring tape. Items marked "DIY" assume comfort with measuring and cutting. A flooring professional can handle any of these installations if you prefer.
1
Temporary and Removable Options
Remove loose bath mats and area rugs
Free · Ready to do now
Mats that slide are trip hazards. If you want something soft underfoot, choose mats with heavy rubber backing that grip the floor when wet. Test by walking on them with damp feet.
Add textured adhesive strips to smooth tile
$8–15 · DIY
Clear or colored strips that stick directly to existing tile. Apply to high-traffic areas like the path from shower to vanity. They last 12–18 months before needing replacement and remove cleanly.
Installing removable non-slip tiles over existing bathroom flooring
Install peel-and-stick textured tiles over existing flooring
$25–60 for average bathroom · DIY
Vinyl tiles with built-in texture that stick directly over most existing floors. No adhesive or tools needed. Can be removed by renters without damage to original flooring. Cut with utility knife to fit around fixtures.
Use rubber bath mats with suction cups
$15–35 · Ready to use
Heavy rubber mats designed for wet areas. Suction cups hold them in place on smooth surfaces. Choose mats sized to cover your most-used floor areas, especially outside the shower and near the toilet.
2
Semi-Permanent Solutions
Apply textured coating to existing tile
$30–50 · DIY (24-hour cure time)
Clear coating that adds grip to smooth surfaces. Brushes or rolls on like paint. Works on ceramic, porcelain, and natural stone. Requires thorough cleaning first and lasts 2–3 years with normal use.
Install interlocking rubber floor tiles
$40–80 for average bathroom · DIY
Snap-together tiles that create a cushioned, slip-resistant surface. Can be installed over existing flooring and removed later. Popular in pool areas and gyms. Provides cushioning for knees and joints.
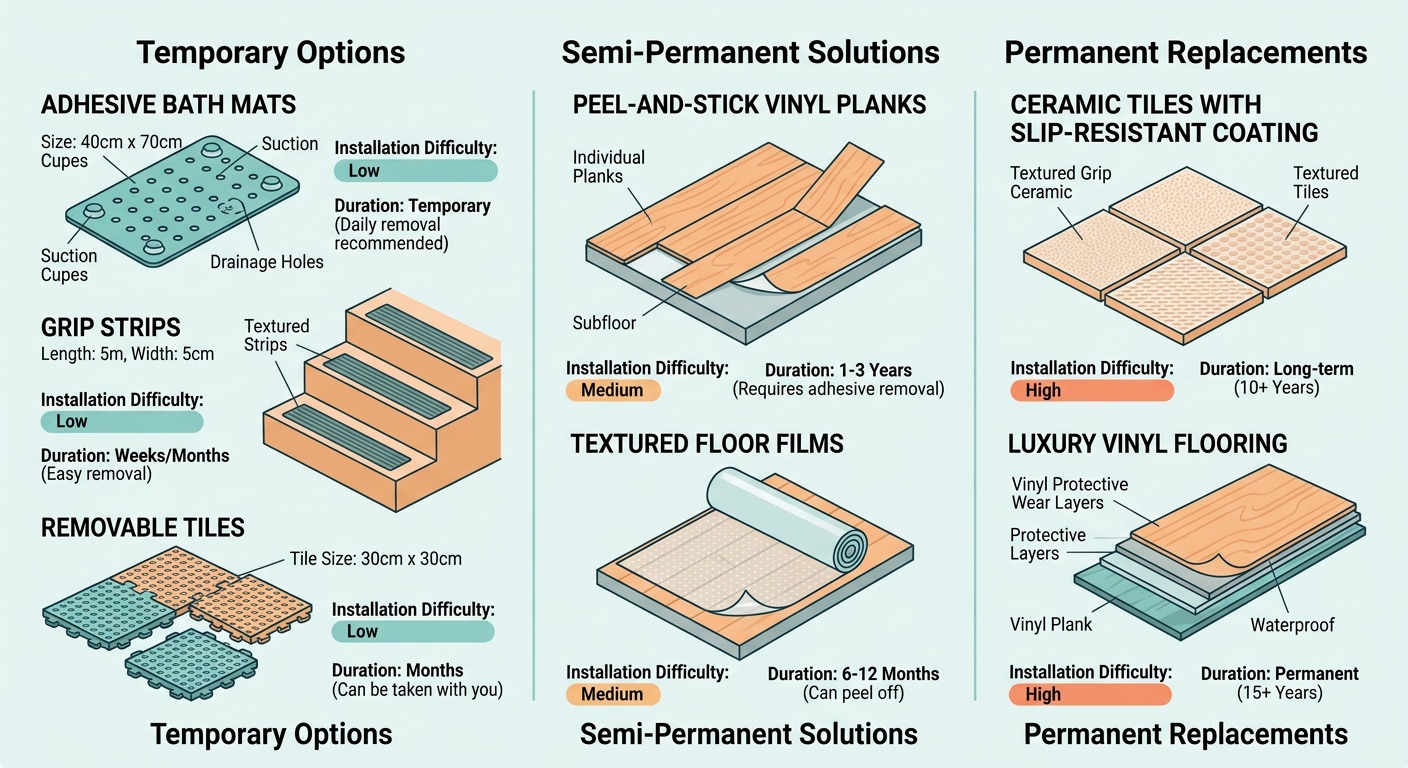
Non-slip flooring options compared by cost, durability, and installation
Add textured vinyl sheet flooring
$60–120 · DIY or professional
One-piece vinyl with built-in texture patterns. Covers the entire floor surface with no seams. Can be cut to fit around fixtures. Professional installation recommended for bathrooms with complex layouts.
3
Permanent Flooring Replacements
Install textured ceramic or porcelain tile
$80–200 · Professional installation
Tiles manufactured with slip-resistant surfaces. Look for tiles rated for wet areas with a coefficient of friction of 0.6 or higher. Requires removal of existing flooring and professional installation for proper waterproofing.
Choose natural stone with honed finish
$120–300 · Professional installation
Slate, granite, or limestone with textured rather than polished surfaces. Naturally slip-resistant when properly sealed. Requires professional installation and periodic sealing to maintain water resistance.
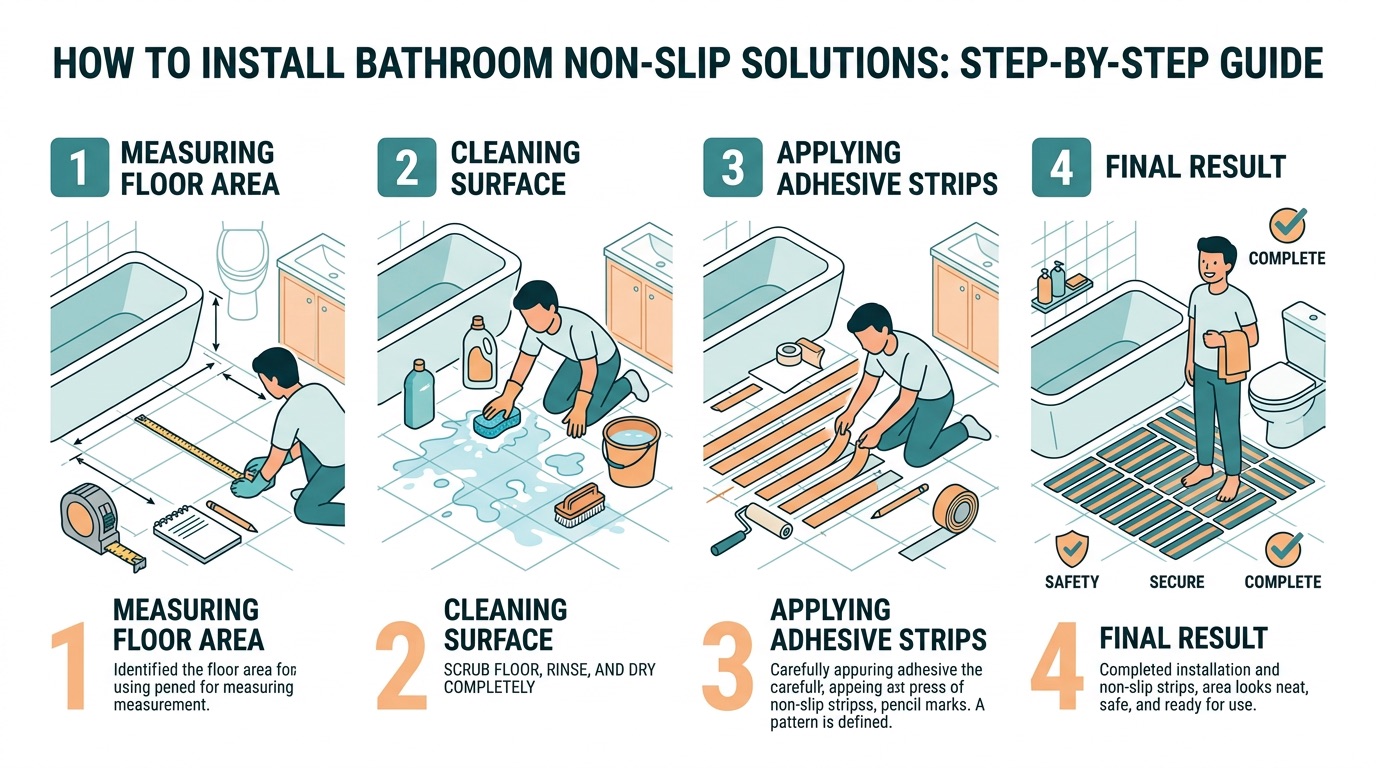
Installation considerations for different non-slip flooring types
Install luxury vinyl planks with textured surface
$90–180 · DIY or professional
Waterproof planks that look like wood but include slip-resistant coating. Many are designed for DIY installation with click-together edges. Good option for bathrooms where you want warmth underfoot.
Consider epoxy flooring with aggregate
$150–400 · Professional installation
Seamless coating with sand or decorative chips mixed in for texture. Popular in commercial settings. Creates completely waterproof surface with no grout lines to maintain. Very durable but permanent.
4
Renter-Friendly Options
Check lease agreement for flooring modification rules
Free · Review first
Some landlords allow temporary modifications. Others require approval for any changes. Know your options before purchasing materials. Keep all documentation for security deposit protection.
Focus on removable solutions first
Deposit protection
Peel-and-stick options, rubber mats, and adhesive strips can all be removed without damage to original flooring. Keep receipts and installation photos to show the landlord when you move out.
Ask about bathroom safety modifications
Potential landlord approval
Many landlords will approve or even pay for safety improvements that benefit future tenants. Present your request with specific product information and cost estimates. Some may even contribute to the cost.
5
Installation and Maintenance Tips
Measure twice, buy once
Planning essential
Bathroom floors often have irregular shapes around toilets and vanities. Draw a simple floor plan with measurements before ordering materials. Account for cuts around fixtures and add 10% extra for waste.
Clean thoroughly before applying anything
Surface preparation
Soap residue and moisture prevent adhesives from bonding properly. Use a degreasing cleaner and let the surface dry completely. This step determines how long your solution will last.
Start with high-traffic areas
Priority zones
The path from the shower to the vanity and the area in front of the toilet get the most use. Focus your efforts there first. You can always add more coverage later if needed.
Test slip resistance when wet
Safety verification
After installation, test the surface with wet feet. If it still feels slippery, consider additional texture or a different solution. The goal is confidence when the floor is wet, not just when it's dry.
Plan for maintenance
Long-term care
Textured surfaces can collect soap scum and require different cleaning methods. Choose solutions you're comfortable maintaining long-term. Some textures clean easily with regular mopping, others need scrubbing.
Where to Start
Begin by removing any loose mats or rugs that slide around. This immediate step costs nothing and eliminates a common trip hazard.
For quick improvement, textured adhesive strips in key areas like the shower exit and toilet area provide good grip for under $15 total.
If you're renting, focus on removable solutions first. Peel-and-stick tiles and rubber mats with good backing can dramatically improve safety without affecting your security deposit.
For permanent solutions, invest in professional installation for anything involving adhesives or waterproofing. The labor cost is worth it for a job that will last 10-15 years.
Test any solution with wet feet before considering the job complete. The true test of non-slip flooring is how it performs when actually wet.
Helpful Resources
AARP HomeFit Guide (free bathroom safety checklist and modification ideas)
Area Agency on Aging (local agencies often provide free home safety assessments)