Bath Mat and Adhesive Strip Placement: A Complete Guide
Strategic placement where you actually need traction
The right placement of bath mats and adhesive strips can transform your bathroom from a slippery hazard into a confident space. This involves strategic placement where you actually need traction, using products that stay put, and creating a setup that works with how you move through your bathroom.
Most bathroom slips happen in predictable spots. The shower floor when you're washing with your eyes closed. The step out of the tub onto a wet floor. The area right in front of the sink where water splashes. Smart placement addresses these specific moments rather than trying to cover the entire room.
1
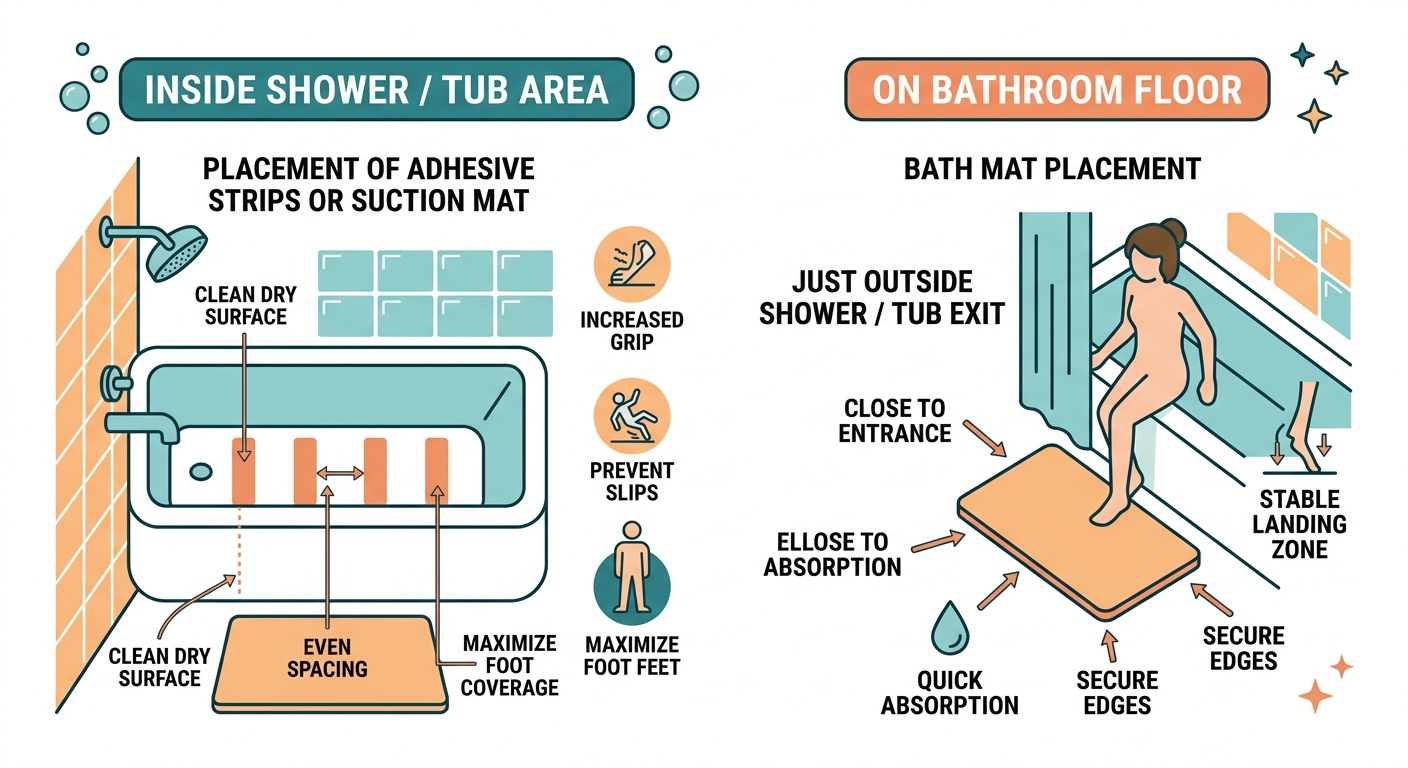
Inside the Shower or Tub
Use adhesive strips, not mats inside the shower
Better grip · Stays in place
Strips stick directly to the tub or shower floor and stay in place when you step on them. Mats inside the shower tend to slide around, which defeats the purpose.
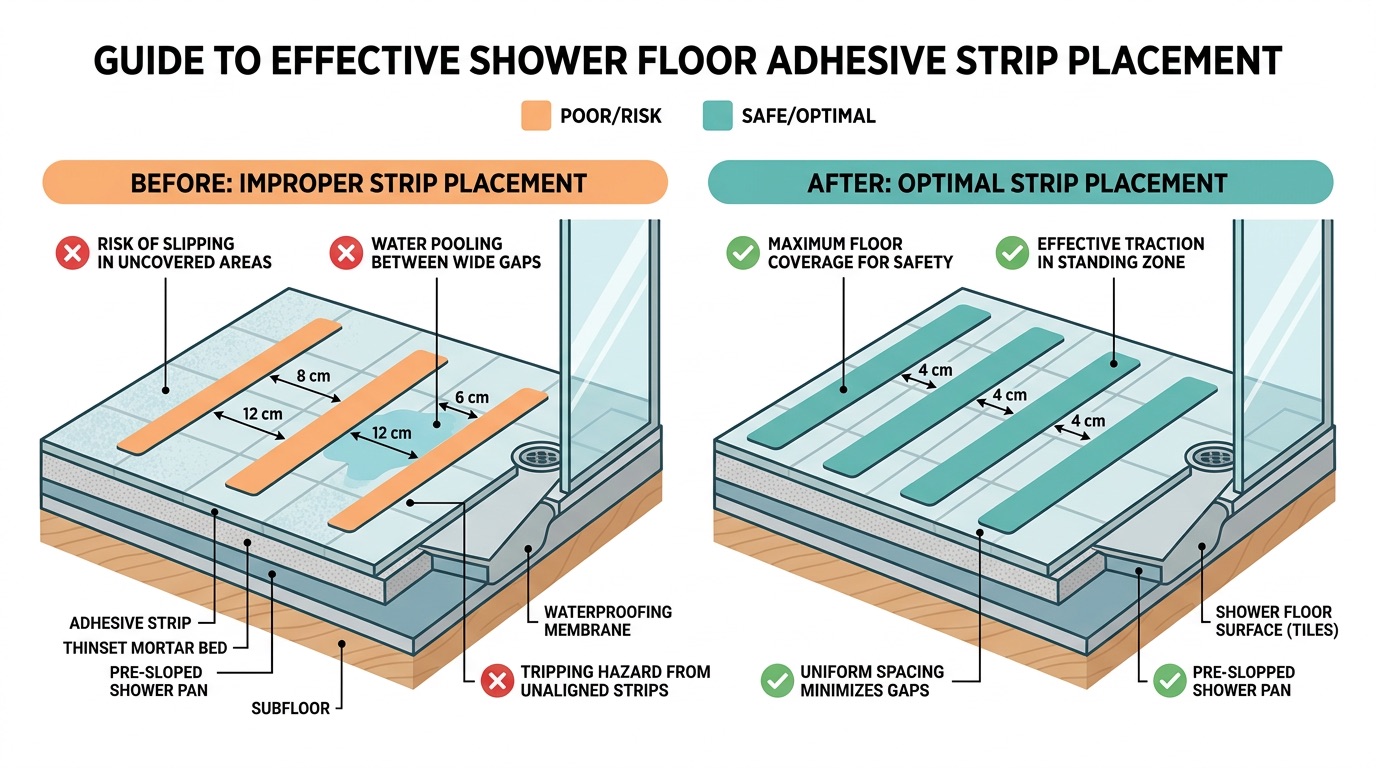
Place strips where you actually stand
6 to 8 strips · Strategic placement
Most people stand in the same spot while showering. Put strips in that area rather than covering the entire floor. If you use a shower chair, place strips around the chair legs and in the area where you step in and out while seated.
Strategic placement for maximum safety
Clean the surface before applying strips
Essential for adhesion · Wait 24 hours to use
Soap residue prevents adhesive from sticking properly. Use a degreasing cleaner or rubbing alcohol, let it dry completely, then apply the strips. Press firmly and avoid using the shower for 24 hours to let the adhesive cure.
Replace strips when they start lifting at the edges
8 to 12 months typical life · Safety first
Most adhesive strips last 8 to 12 months with regular use. When corners start peeling up, the strip becomes a trip hazard. Remove old strips completely, clean off any residue, and apply fresh ones.
2
Outside the Shower or Tub
Use a bath mat with heavy rubber backing
Skip decorative rugs · Weight matters
The mat needs to grip the floor when wet feet land on it. Lightweight decorative rugs slide on wet floors. Look for mats that feel heavy when you pick them up and have thick, textured rubber on the bottom.
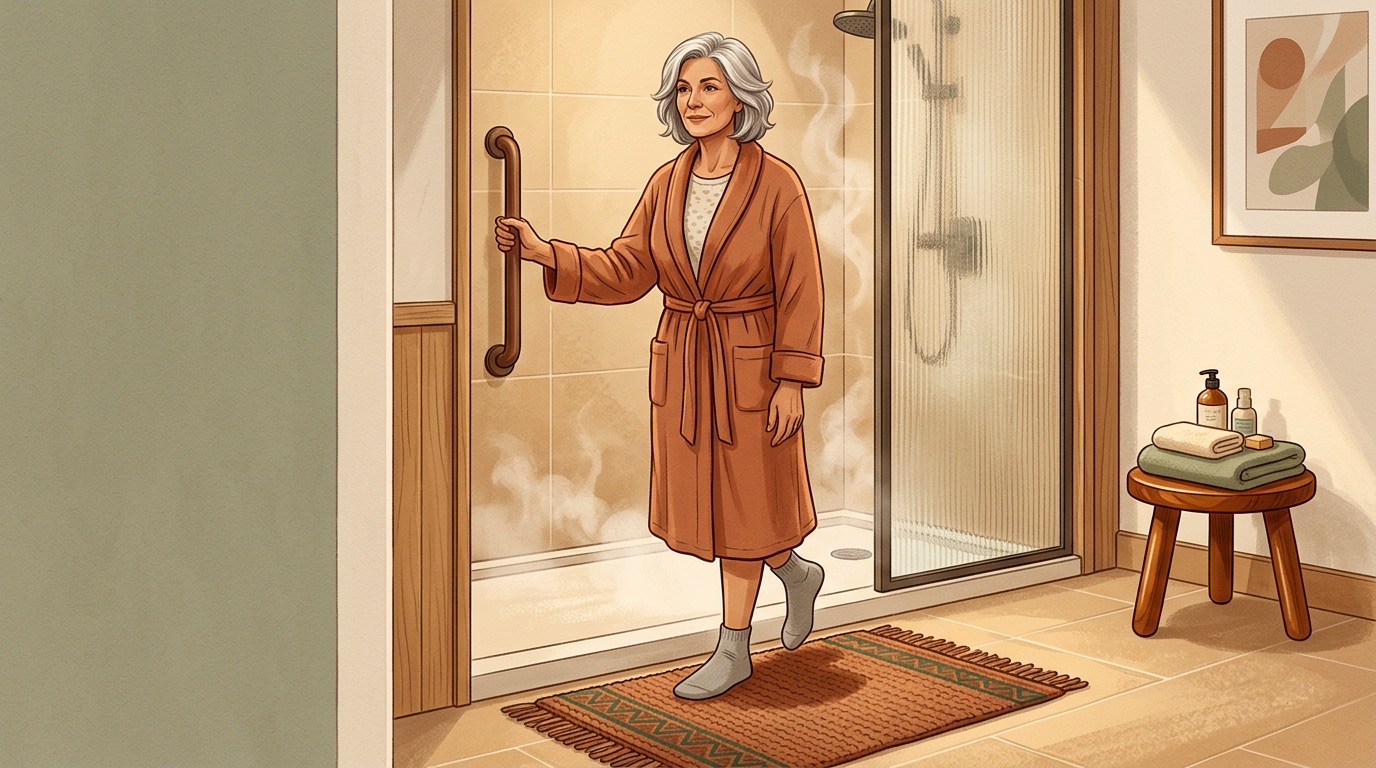
Position the mat where your first step lands
Test your natural movement · Both feet coverage
Stand inside your shower or tub and step out normally. Where your foot lands is where the front edge of the mat should be. The mat should extend far enough that both feet can land on it before you step onto the bare floor.
Safe exit placement for shower and tub
Keep the mat flat against the floor
No curled corners · Immediate flatness
If corners curl up, the mat becomes a trip hazard. Mats with rubber backing should lie flat immediately. If yours doesn't, try a different brand or style. Some mats need 24 hours to settle into position.
Wash rubber-backed mats carefully
Gentle cycle · Skip fabric softener
Machine wash on gentle cycle with cold water. Skip the fabric softener, which can break down rubber backing. Air dry completely before putting it back in place. A damp mat will lose its grip on the floor.
3
Problem Areas to Address
The area in front of the sink
Often overlooked · Water splashes here daily
Water splashes here every time you wash your hands or brush your teeth. If your bathroom has smooth tile or vinyl flooring, consider a small mat in front of the sink. It should have rubber backing and be sized so you can step around it easily.
Common slip hazard areas and solutions
Transition areas between different floor surfaces
Bridge the gap · Extra caution zone
The spot where bathroom tile meets hallway carpet or hardwood can be slippery when your feet are damp. A bath mat that extends slightly into this transition zone helps bridge the gap safely.
Around the toilet
Keep clear · Avoid trip hazards
This area sees slower movement and off-balance positions. Keep this area clear of mats or rugs that could catch your foot. If you want something soft underfoot here, use a mat with rubber backing, rather than a decorative rug.
Installation and Maintenance
Walk through your bathroom routine carefully. Notice where you step, where water collects, and where you feel unsteady. Measure your spaces so you know the dimensions of your shower floor and the area outside your tub before shopping.
Start with the shower by installing adhesive strips where you stand most often, since this addresses the highest-risk area first. Add a quality bath mat placed where you step out, making sure it lies flat and has proper rubber backing.
Test everything by stepping on strips and mats with slightly damp feet to make sure they provide the grip you expect. Check adhesive strips monthly for lifting edges, and wash bath mats weekly to maintain their grip.
For renters: Adhesive strips are removable when applied properly. They peel off without damaging the tub surface. Bath mats require zero installation and are completely portable.
Free Resources
AARP Home Fit Guide (free assessment tool to identify bathroom safety needs)